(scroll down for English)
Hace tiempo os enseñé cómo hacer un alfabeto móvil DIY, pero se me quedó pendiente escribir otro post explicando cómo utilizarlo! Así que aquí va, gracias por recordármelo Paulina!
Antes de presentar el alfabeto móvil a un niño tenemos que asegurarnos de que se cumplen ciertos requisitos:
- Que sea capaz de aislar los sonidos que componen una palabra.
- Que conozca todos los sonidos del alfabeto y sus correspondientes símbolos* (que habremos trabajado con las letras de lija). Si el niño no conoce todas las letras pero percibimos que tiene interés en formar palabras, podemos presentarle el alfabeto móvil pero sólo las letras que ya conoce, y con palabras que habremos seleccionado para que sólo contengan las letras que conoce. Es mejor si las conoce todas porque así podrá trabajar por sí mismo con cualquier palabra que se le ocurra.
* No es necesario que conozca el nombre de las letras, en Montessori se aprende primero el sonido de cada letra y más adelante su nombre.
Y por nuestra parte debemos tener en cuenta varios detalles al realizar la presentación:
- Cuando el niño forme una palabra no debemos pedirle que la lea. Escribir es codificar mientras que leer es descodificar, y muchos niños están preparados para escribir mucho antes de estar listos para leer.
- Si el niño forma una palabra con faltas de ortografía no debemos corregirle, ya que al formar las palabras fonéticamente es posible que confunda c con k, b con v... Esto es totalmente normal al principio y el niño lo irá corrigiendo con el tiempo.
Presentación
- En primer lugar le decimos al niño que le vamos a mostrar un material que se llama alfabeto móvil, abrimos la caja para que vea las letras y la colocamos en la parte superior de la alfombra.
- Le decimos: "Con estas letras podemos formar palabras, por ejemplo, ahora voy a formar la palabra gato."
- "Cuál es el primer sonido de gato?" Si el niño no lo dice , lo decimos: "/g/"
- Buscamos la letra g y la colocamos en la alfombra, bajo la esquina inferior izquierda de la caja del alfabeto.
- "Cuál es el siguiente sonido de gato?" Si el niño no lo dice , lo decimos: "/a/"
- Buscamos la letra a y la colocamos a continuación de la g.
- "Cuál es el siguiente sonido de gato?" Si el niño no lo dice , lo decimos: "/t/"
- Buscamos la letra t y la colocamos a continuación de la a.
- "Cuál es el siguiente sonido de gato?" Si el niño no lo dice , lo decimos: "/o/"
- Buscamos la letra o y la colocamos a continuación de la t.
- "Cuál es el siguiente sonido de gato? No tiene más sonidos, verdad?"
- A continuación invitamos al niño a formar una palabra, si le vemos inseguro podemos formar alguna más hasta que quiera hacerlo solo.
Una vez presentado el alfabeto móvil, el niño puede cogerlo para formar palabras siempre que quiera, pero en caso de que no conozca todas las letras debemos darle nosotros las palabras para evitar que se encuentre con letras que no conoce y se sienta bloqueado o frustrado por no poder formar la palabra.
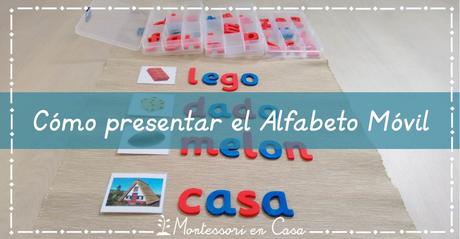
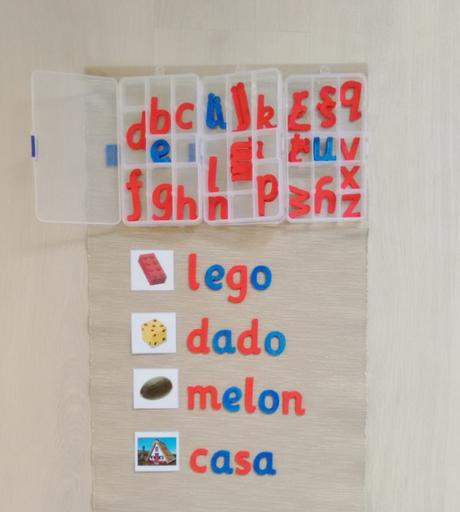
Una variación consiste en ofrecer al niño pequeños objetos o tarjetas con imágenes para que forme las palabras correspondientes. Podemos guardar los objetos en una cajita junto con unas tarjetas con las palabras escritas, que servirán como control de error, para que el niño compruebe si ha formado bien las palabras.

Cuando el niño se siente cómodo formando palabras, podemos mostrarle cómo formar frases, haciéndolo nosotros primero para que vea cómo dejar un espacio entre cada dos palabras.
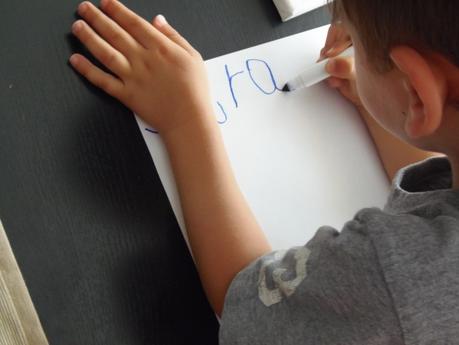
El alfabeto móvil es ideal para niños que ya quieren formar palabras pero todavía no tienen suficiente fuerza y/o destreza manual para escribir, pero también es un material muy útil para niños que ya son capaces de escribir letras. En este último caso es posible que el niño quiera escribir en un papel las palabras que ha formado, como a veces hace Alejandro.

Te ha gustado este post? Compártelo!
------

Some time ago I showed you how to make a DIY movable alphabet, and I was supposed to write another post explaining how to use it, but I completely forgot to do it! So here it goes, thanks for the remainder Paulina!
Before presenting the movable alphabet to a child we need to ensure that certain requirements are met:
- The child must be able to isolate the sounds that make up a word.
- The child must know all the sounds of the alphabet and their corresponding symbols* (which will have worked with sandpaper letters). If the child does not know all the letters but shows interest in forming words, we can introduce the movable alphabet but only the letters that he knows, and we will have chosen words that contain only those letters. It is better when the child knows all the letters so he can work by himself with any word that comes to mind.
* The child doesn't need to know the name of the letters, in Montessori first learn the sound of each letter and later his name.
On our part we must consider several details when making the presentation:
- When the child builds a word we never ask him to read it. Writing is encoding while reading is decoding, and many children are ready to write long before they are ready to read.
- If the child misspells a word we should not correct him. This is completely normal at the begining as they are building the words phonetically.
Presentation
- First we tell the child that we will show him a material called movable alphabet, we open the box and place it on the top left corner of the carpet.
- We say: "These letters can build words, for example, now I'm going to build the word cat."
- "What it is the first sound of cat?" If the child does not say, we say: "/ c /"
- We seek the letter c on the box and place it on the carpet under the bottom left corner of the alphabet box.
- "What is the next sound cat?" If the child does not say, we say: "/ a /"
- We seek the letter a on the box and place it following the c.
- "What is the next sound cat?" If the child does not say, we say: "/ t /"
- We seek the letter t on the box and place it after the a.
- "What is the next sound cat? No more sounds, right?"
- Then we invite the child to form a word, if he doesn't feel like doing it we can form some more until he wants to do it by himself.
After presenting the movable alphabet, the child can use it to buid words whenever he wants, but if he doesn't know all the letters we must give him the words to build so he doesn't encounter unfamiliar letters and feels blocked or frustrated because he can't build the word.
A variation consists in offering the child small objects or picture cards so he can form the corresponding words. We can keep objects in a box with a card with the written words, which will serve as control of error.
When the child feels comfortable forming words, we can show him how to form sentences, showing him how to leave a space between every two words.
The movable alphabet is great for children who already want to form words but whose hands are not ready yet to write, but it's also a very useful material for children who are already able to trace the letters. In the latter case the child may want to write down on paper the words formed, as Alejandro sometimes does.
Did you enjoy this post? Share the love!
Otros posts que te pueden interesar:
(Visited 4 times, 1 visits today)

