Tutorial creado para Todoboda.
This tutorial was created for Todoboda.
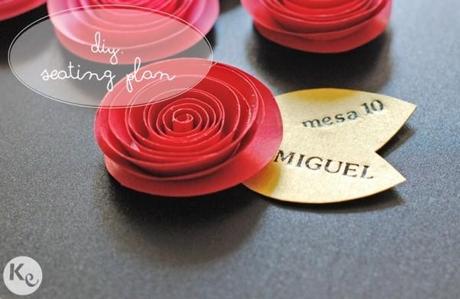
Hoy os proponemos crear unas bonitas flores con cartulina. En esta ocasión vamos a utilizarlas para montar un seating plan diferente. Pero también podéis crear guirnaldas con ellas o decorar las mesas, incluso hacer centros de mesa.
Today, we are going to make beautiful card flowers. This time, we will use them to make a different seating plan. But you can also use these flowers to create garlands, decorate tables or even, make your own centerpieces.
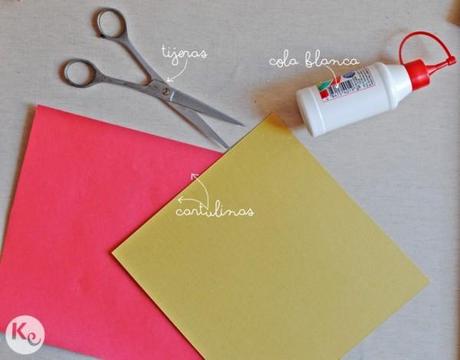
Los materiales que utilizaremos son los siguientes:
• Cartulinas de colores.
• Una plantilla para imprimir las espirales en la cartulina, que puedes descargar aquí.
• Tijeras.
• Cola blanca.
• Un rotulador o plantillas para poner los nombres.
These are the elements we are going to use:
• Cards of different colours.
• A template to print spirals on the cards. Download it here.
• A pair of scissors.
• Glue.
• A felt-tip pen or transferable letters for the names.
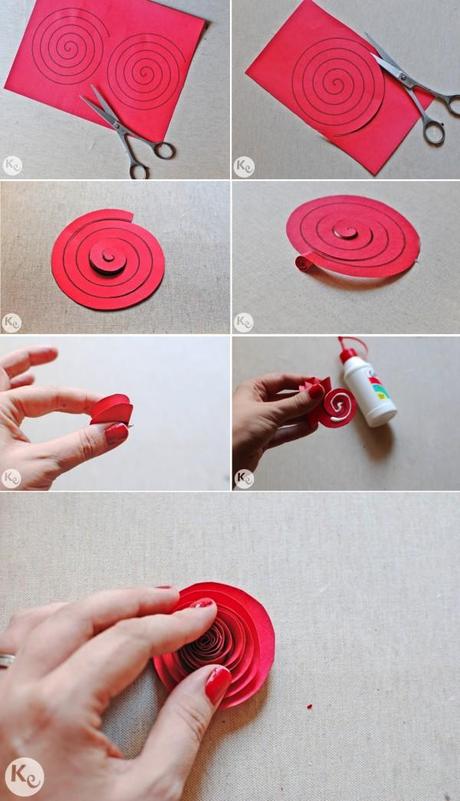
1. Imprime las espirales en la cartulina. Nosotros las hemos imprimido en negro para que se vean mejor en las fotos, pero la plantilla descargable está en gris y os aconsejamos imprimirla en borrador para que no se marque mucho y no se vea al recortar.
1.Print spirals on the cards. We have used black colour so that it is better appreciated on the pictures, but the template comes in grey. We suggest you to print it in draft mode to avoid it from getting well marked so that it can’t be seen after cutting.
2. Recorta cada espiral por dentro de la línea.
2. Cut out every spiral by the inner edge of the line.
3. Enrolla la espiral empezando por la parte externa hasta que llegues al centro.
3. Wind the spiral “outside in”.
4. Ya tienes la flor, solo tienes que poner un poco de cola blanca en el extremo interior y soltar la espiral.
4. You already have got the flower, and you just have to put a little glue on the lower side and release it.
5. Haz presión sobre la parte superior para que se pegue bien. Nosotros colocamos un tope encima durante un rato para que se pegara completamente.
5. Apply some pressure on the upper side so that it gets perfectly sticked (for instance, place it under some weight for a while).
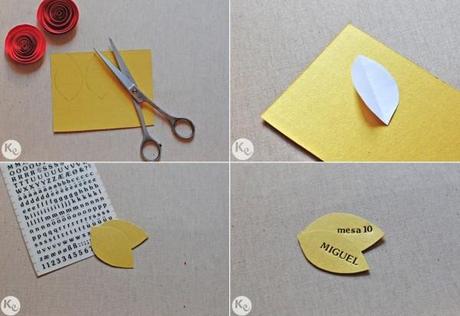
6. Crea una plantilla en forma de hoja (dobla un trocito de papel y recorta la mitad de un óvalo para que sea simétrica).
6. Make a leaf-shaped pattern (by folding a tiny piece of paper and cutting half an oval to make it symmetric).
7. Dibuja dos hojas sobre la cartulina.
7. Draw two leafs on the card.
8. Recorta las hojas.
8. Cut the leafs out.
9. Para colocar los nombres y el número de mesa, hemos utilizado letras transferibles. Ya conocéis mis problemas con la caligrafía, pero podéis hacerlo a mano con un rotulador.
9. We have used transferable letters to write names and table numbers, but you can use a felt-tip pen as well.
10. Pega juntas las dos hojas.
10. Stick the to leaves together.
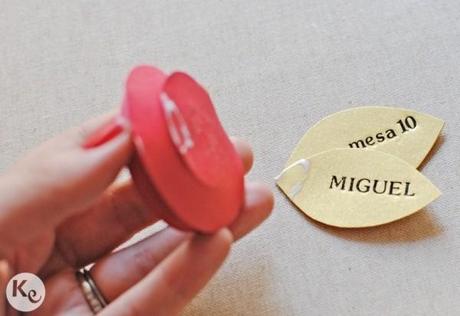
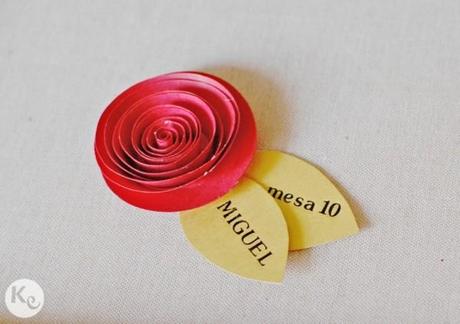
11. Pega la flor a las hojas y ya está, tiene tu primera flor para crear tu seating plan.
11. Stick flower and leaves together and you’re done!, this is your first flower of your seating plan.
Imágenes/Images: A Kiss of Colour

