(scroll down for English)
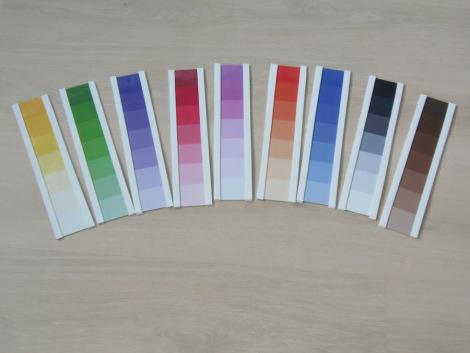
La caja de colores #3 es otro de los materiales que se pueden hacer en casa con materiales muy económicos, yo estoy muy contenta de cómo me han quedado las tabletas, cumplen su función perfectamente y son bastante resistentes. Os animáis? Vamos allá!
Materiales:
- Imprimible de las tabletas de colores. Yo he utilizado el imprimible gratuito de “Montessori Album”.
- Goma EVA de color blanco (1 pliego A3 o 2 pliegos A4)
- Regla
- Cutter
- Tijeras
- Cizalla (si no tenéis podéis utilizar las tijeras)
- Pegamento
- Caja con 9 compartimentos para guardar las tabletas
Pasos:
1. Imprimimos el imprimible (valga la redundancia) y lo plastificamos. Una vez plastificado cortamos cada fila de tabletas con la cizalla o las tijeras, os quedará algo así:

2. Cortamos con el cutter y la regla las tiras de goma EVA que serán el borde de las tabletas. Las tiras deben tener una anchura de 1 cm y una largura igual a la de la fila de tabletas. Como tenemos 9 filas (9 colores) y tenemos que poner 4 tiras en cada una, necesitaremos en total 36 tiras de goma EVA.

3. Una vez cortadas las tiras de goma EVA las pegamos sobre las franjas blancas de las filas de colores (por delante y por detrás).

4. Ahora sólo tenemos que cortar con las tijeras las tabletas de colores…

5. Y listo, las colocamos en su caja ordenadas y ya las tenemos preparadas para trabajar con ellas.

————
The color box # 3 is another material that can be done at home with very cheap materials, I am very happy how the tablets have turned out, they serve their function perfectly and are quite resilient. Will you give it a try? Here we go!
Materials:
- Printable color tablets. I‘ve used the free printable from “Montessori Album”.
- White EVA foam (1 A3 sheet or 2 A4 sheets)
- Ruler
- Cutter
- Scissors
- Shears (if you don’t have you can use scissors)
- Glue
- Box with 9 compartments to keep the tablets
Steps:
1. We print the printable (pun intended) and we laminate. Once laminated we cut each row of tablets with the shears or scissors.
2. We cut with cutter and ruler EVA foam strips that will be the edge of the tablets. The strips must have a width of 1 cm and a length equal to that of the row of tablets. As we have 9 rows (9 colors) and we have to put 4 strips in each, we will need a total of 36 strips of EVA foam.
3. We stick the EVA foam strips on the white stripes of the colored rows (front and back).
4. Now we just have to cut with scissors the colored tablets …
5. And ready, we put them in their box and keep them ordered and prepared to work with them.


