Para comenzar a bordar tenemos que conocer algunos detalles que son bastante importantes para que nuestro trabajo quede perfecto.
To start embroidering we should know some quite important details to obtain a perfect result.
¿Cómo usamos el bastidor?
How do we use the frame?
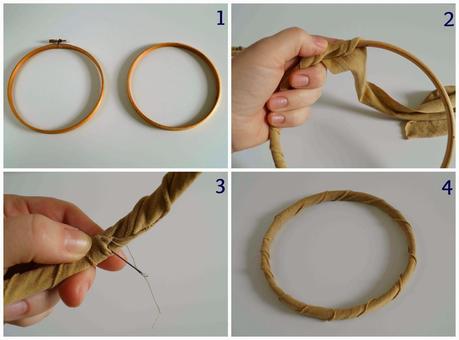
1. Debemos forrar con tela el aro interno para no dañar la tela en la que bordamos y para evitar que se mueva, ya que así no resbala en la madera. Cortamos una tira de tela, preferiblemente de algodón (a mi me gusta emplear tela de camisetas viejas), y envolvemos el aro superponiendo las vueltas. Con unas puntadas fijamos el extremo final.
1. We must wrap the inner ring with cloth to avoid damage to the fabric we embroider and to prevent it from moving, as it could otherwise slide. Cut a strip of fabric, preferably of cotton (I like to use fabric from old t-shirts), and wrap the ring overlapping the strip around. Secure the end with some stitches.
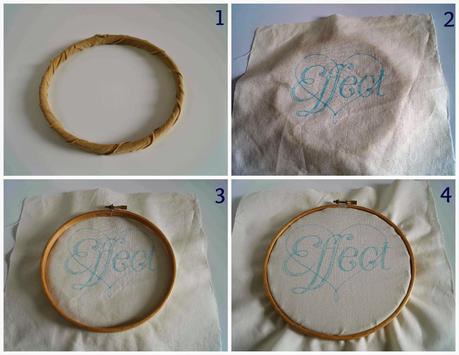
2. Para colocar la tela en el bastidor la centramos sobre el aro interno, colocamos encima el aro exterior y presionamos hasta que quede dentro el aro interno. Después lo ajustamos con el tornillo, tensando la tela de forma que quede sin arrugas, con la misma tensión en todas las zonas y la trama no quede torcida. Si tocamos la tela y "suena como un tambor" está suficientemente tensa.
Es mejor utilizar bastidores grandes para tener más libertad de movimientos y no "chocar" con el bastidor al bordar. Si la tela es pequeña se puede hilvanar temporalmente a otras telas para poder sujetarla al bastidor.
2. To place the fabric in the frame, centre it on the inner ring, place the outer ring and press until the inner is inside. Next fit the screw, tightening the fabric so there are no wrinkles, with the same tension in all the areas and the weave is not twisted. If we touch the fabric and it sounds like a drum, then it is sufficiently tense. It is better to use big frames in order to have more freedom of movement and to avoid it bothers when embroidering. If the fabric is small it can be basted temporarily to other fabrics to be able to hold it to the frame.
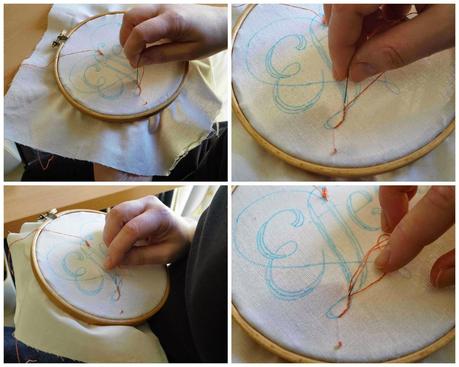
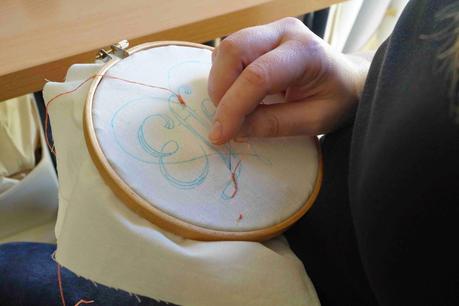
3. Si el bastidor es muy pequeño no tenemos otro remedio que cogerlo con una mano y bordar con la otra, pero si es más grande colocaremos las manos correctamente: si eres diestro, la mano izquierda bajo el bastidor recogiendo la aguja cuando sale por el revés de la tela y devolviéndola al derecho, donde se encontrará la mano derecha haciendo el movimiento contrario. Si eres zurdo, al revés. El bastidor lo soportamos sobre la muñeca izquierda en el primer caso y sobre la derecha en el segundo, además de apoyar el borde sobre una mesa o sobre nuestro torax si no tenemos mesa. Lo ideal, no obstante, es emplear bastidores con pies.
3. If the frame is very little we have no choice but to take it with a hand and to embroider with the other one, but if it is bigger we will place the hands correctly: if you are right-handed, the left hand under the frame picking the needle when it comes out by the back of the fabric and pushing it towards the face, where the right hand will be and do the opposite move. If you are left-handed, you will do the other way round. We will support the frame on the left wrist in the first case and on the right in the second one, apart from resting the edge on a table or on our thorax if we do not have table. Ideally, nevertheless, is to use frames with floor stand.
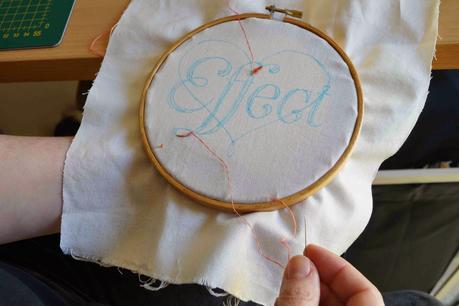
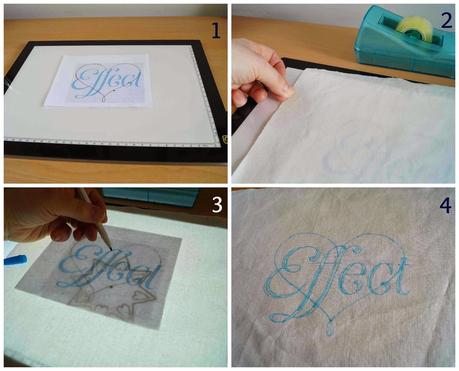
- Podemos calcarlo directamente: una vez tengamos el diseño en papel, ponemos encima la tela fijándola con cinta adhesiva o alfileres y calcamos con un lápiz o un rotulador soluble al agua.
- Utilizando una mesa de luz, siguiendo el proceso anterior.
- Si la tela es oscura una buena opción es emplear papel carbón de costura: colocamos la tela, encima el papel carbón y finalmente el papel con el dibujo. Calcamos con un lápiz afilado.
- Para bordar en telas gruesas se suele hilvanar sobre papel: dibujamos el motivo en papel de seda, lo sujetamos con alfileres a la tela y hacemos un pespunte cogiendo el papel y la tela. Después quitamos el papel con cuidado.
- We may trace it directly: once let's have the design on paper, put the fabric on fixing it with adhesive tape or pins and trace with a pencil or a wash-away pen.
- Also using a light table, following the previous process.
- If the fabric is dark a good option is to use dressmaker’s sewing carbon paper: place the fabric, put the carbon paper on and finally the paper with the drawing. Trace with a sharp pencil.
- To embroider on thick fabrics is usually basted on paper: draw the motif on silk paper, hold it with pins to the fabric and make a backstitch joining the paper and the fabric. Then remove the paper carefully.
